
Kitsuke Explained: Step-by-Step Traditional Kimono Dressing for Beginners
Traditional Kimono & Cultural Appreciation
Kitsuke Explained: Step-by-Step Traditional Kimono Dressing for Beginners
⚡ Quick Answer
Learning how to wear a traditional kimono, known as Kitsuke, involves a series of precise steps, starting with inner garments like the hadajuban and nagajuban. You then wrap the kimono, ensuring the left side goes over the right, and secure it with koshihimo ties and a datejime belt. Finally, the elegant obi is tied, completing this beautiful, culturally rich ensemble. With practice, the process becomes a meditative art.
Introduction to Kitsuke: The Art of Kimono Dressing
Konnichiwa! Yuki here, straight from Tokyo, ready to unravel one of Japan's most beautiful traditions: Kitsuke. This isn't just about putting on clothes; it's an intricate art form, a dance of fabric, ties, and cultural understanding that transforms you into a living piece of Japanese heritage. For beginners, it might seem a little daunting at first, with all the layers and specific techniques, but I promise you, it's a wonderfully rewarding journey. Think of it as learning to play a musical instrument – challenging, yes, but immensely satisfying when you finally hit those harmonious notes. In my experience, many people outside Japan are fascinated by the kimono but feel intimidated by the idea of wearing one traditionally. They see the perfectly styled geisha or the elegant women at festivals and wonder how on earth it's all put together. What surprised me when I first started learning Kitsuke was just how logical and practical each step is, even if it feels complex initially. Every tie, every fold, every accessory serves a purpose, from creating that iconic cylindrical silhouette to ensuring comfort and elegance throughout the day. This guide is designed to be your friendly, practical roadmap to mastering the basics of traditional kimono dressing. We're going to break down Kitsuke into manageable steps, demystifying the process and giving you the confidence to try it yourself. Whether you're preparing for a special event, a cultural immersion, or simply want to deepen your appreciation for Japanese fashion, understanding Kitsuke is truly the gateway to the kimono's soul. So, let's roll up our sleeves – or rather, learn how to fold them correctly – and dive in!Kitsuke's Cultural Heart
Kitsuke (着付け) literally means "the act of dressing" and refers specifically to the traditional method of wearing a kimono. It's an art passed down through generations, embodying principles of balance, symmetry, and grace. Each movement and placement is deliberate, reflecting a deep respect for the garment and the occasion it represents. Learning Kitsuke is a way to connect directly with centuries of Japanese aesthetic and cultural values.
Essential Kitsuke Tools & Accessories
Before we even touch the kimono itself, it's crucial to gather all your tools. Imagine trying to bake a cake without all the ingredients! Kitsuke requires a specific set of accessories, each playing a vital role in creating that classic, elegant silhouette and ensuring the kimono stays perfectly in place. Don't worry if the list seems long; once you understand what each item does, it all makes perfect sense. Firstly, you'll need the foundational layers: a Hadajuban, which is a thin undergarment (often a two-piece set with a top and a skirt called a Susoyoke), and a Nagajuban, which is the inner kimono. These aren't just for modesty; they protect your precious kimono from sweat and oils, and the nagajuban provides a crucial base for shaping. Next up are the tying cords: several Koshihimo, which are long, thin fabric sashes. You'll typically need at least three, sometimes more, depending on your body shape and the style of kimono. Then come the shaping and securing elements: one or two Datejime, which are wider, stiffer belts used to flatten the waist and secure layers. If you're tying a more complex obi knot, you’ll also need an Obi-ita (a stiff board to keep the obi smooth in front) and an Obi-makura (a small pillow to give shape to the back of the obi). Finally, for the obi itself, you'll need the main Obi, an Obijime (a decorative cord tied over the obi), and an Obiage (a decorative scarf tucked into the top of the obi). Don't forget your Tabi (split-toe socks) and appropriate footwear like Zori or Geta!- Hadajuban & Susoyoke: Base undergarments for hygiene and comfort.
- Nagajuban: Inner kimono for shape, protection, and a peeking collar.
- Koshihimo (3-4): Thin tying sashes to secure various layers.
- Datejime (1-2): Wider belts to flatten the waist and secure the kimono.
- Obi-ita: Front board to keep the obi smooth.
- Obi-makura: Pillow to shape the obi knot at the back.
- Obi: The main decorative sash.
- Obijime: Decorative cord to secure the obi.
- Obiage: Decorative scarf tucked above the obi.
- Tabi: Split-toe socks.
- Zori/Geta: Traditional footwear.
Step 1: Preparing Your Undergarments (Hadajuban & Nagajuban)
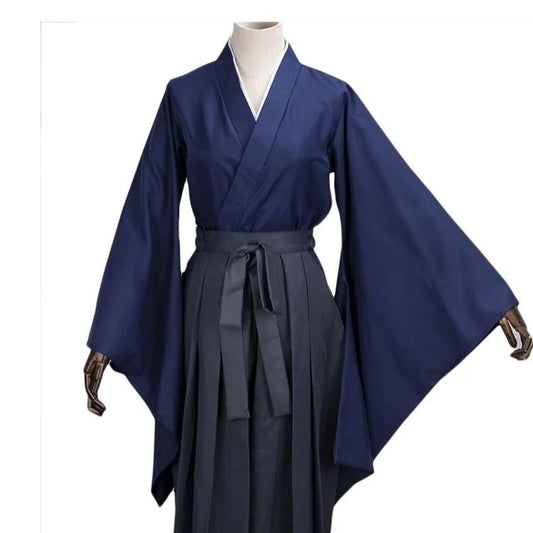
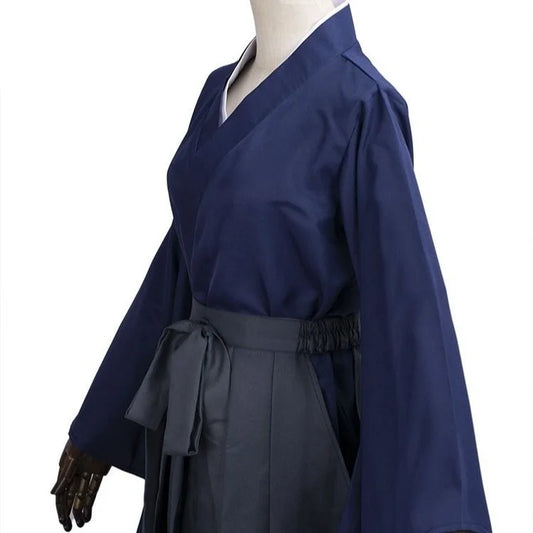
The foundation of any beautifully worn kimono lies in its undergarments. This isn't just about modesty; it's about creating the perfect canvas for the kimono to drape flawlessly. Think of it like building a house – a strong foundation is absolutely key. We start with the Hadajuban and Susoyoke, which act as your first layer, much like a slip. These are typically made of cotton or silk, designed to absorb sweat and protect your more valuable kimono from direct contact with your skin. Put these on first, ensuring they're smooth and comfortable. Next comes the crucial Nagajuban. This is essentially a simpler, thinner kimono worn underneath the main one. Its purpose is twofold: to provide an additional layer of protection and, more importantly, to give structure and shape. The nagajuban's collar is designed to peek out from under the kimono's collar, adding a subtle touch of elegance and colour. When putting on your nagajuban, focus on getting the collar just right. You want a neat, even 'V' shape at the front, with a slight gap at the back of the neck (about a fist's width for formal wear, or less for casual). This 'nuki-eri' gap is a hallmark of traditional kimono styling and ensures comfort. Once the nagajuban is on, secure it with a single Koshihimo around your waist. Tie it snugly but not uncomfortably tight, making sure all wrinkles are smoothed out. The goal here is to create a smooth, cylindrical shape from your shoulders down to your hips. In my experience, getting the nagajuban right makes all the difference to the final look; a lumpy nagajuban will result in a lumpy kimono. Take your time with this step, adjusting and smoothing until you feel perfectly flat and ready for the main event.Creating the Kimono Silhouette
Traditional kimono dressing aims for a smooth, cylindrical figure, rather than accentuating curves. This is why padding (like towel rolls) might be used around the waist and hips to create an even surface. The nagajuban and subsequent ties work to compress and smooth, allowing the kimono to fall gracefully without bumps or hollows.
Step 2: Donning the Kimono
Now for the star of the show: the kimono itself! Hold the kimono by the collars, letting it hang. Carefully slide your arms through the sleeves. The key here is to centre the kimono on your body. Hold the two front panels and pull them gently to the side, ensuring the seam down the back of the kimono aligns perfectly with your spine. This initial centering is vital for balance and symmetry, which are cornerstone principles in Kitsuke. Next, you’ll wrap the kimono. First, bring the right panel across your body, ensuring it covers your left hip. Then, bring the left panel over the right, creating the classic overlap. This "left over right" rule is absolutely non-negotiable for anyone living, as wrapping right over left is reserved for dressing the deceased. This is a crucial cultural point that every beginner must recognise and respect. After the initial wrap, you'll adjust the length. Traditional kimonos are often quite long, so you'll create a tuck-up called an Ohashori. Lift the kimono fabric from the bottom until the hem just skims the tops of your feet. This excess fabric is then folded neatly inwards, forming a clean, even line around your waist. This creates the illusion of a perfectly tailored kimono and is a hallmark of proper Kitsuke. I've found that patience here is your best friend – don't rush the Ohashori, as a messy one can ruin the entire look.300+
Years of Kitsuke evolution
3-5
Koshihimo typically used
60-90
Mins for beginner dressing
50%
Of comfort from inner layers
Step 3: Securing with Koshihimo & Datejime
With the kimono draped and the length adjusted, it's time to secure everything into place with your Koshihimo and Datejime. These aren't just belts; they're the invisible scaffolding that holds the kimono's shape. Your first koshihimo goes around your waist, just below your bust. This secures the ohashori and keeps the kimono's hem at the correct length. Tie it firmly, but again, not so tight that it restricts your breathing. The goal is to feel secure, not squeezed. Once that first koshihimo is in place, you'll need to smooth out any wrinkles, especially across your back and chest. Reach inside the kimono and pull the front panels slightly upwards and outwards from your armpits, then smooth the fabric down. This helps eliminate creases and creates that smooth, flat surface. This attention to detail is what separates a well-dressed kimono from one that looks a bit dishevelled. You can even use a second koshihimo to further flatten the chest area if needed, especially for those with a curvier figure, helping to achieve that desired cylindrical shape. Now, take your Datejime. This wider, firmer belt is wrapped around your waist, over the koshihimo, flattening any remaining bumps and securing all the layers of the kimono and nagajuban. Tie it neatly at the front or back, ensuring it lies flat and taut. Some people use two datejime for extra security, especially if they’ll be moving a lot. Remember, the tighter the datejime, the flatter your silhouette, but always prioritise comfort. These securing steps are fundamental to how well the kimono wears throughout the day, ensuring the fabric doesn't shift or wrinkle. This intricate layering and tying is quite different from simply slipping into something like modern kimono styling or even casual kimono cardigan outfits.Avoid Over-Tightening!
While securing the kimono firmly is important, be careful not to tie your koshihimo and datejime too tightly. Over-tightening can cause discomfort, restrict breathing, and even lead to a less flattering silhouette by creating bulges instead of a smooth line. Aim for snug, not constrictive.
Step 4: Tying the Obi
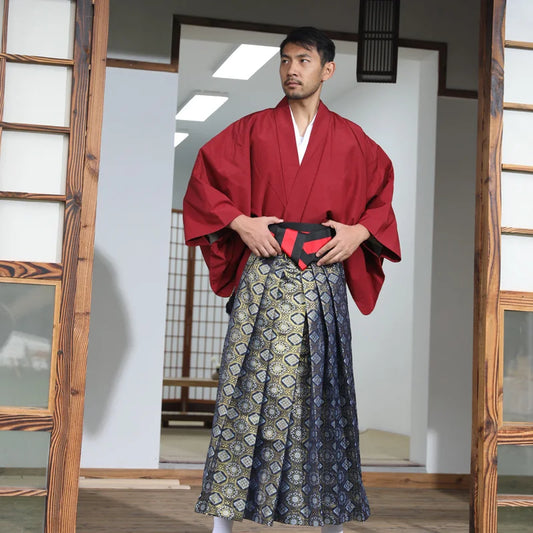
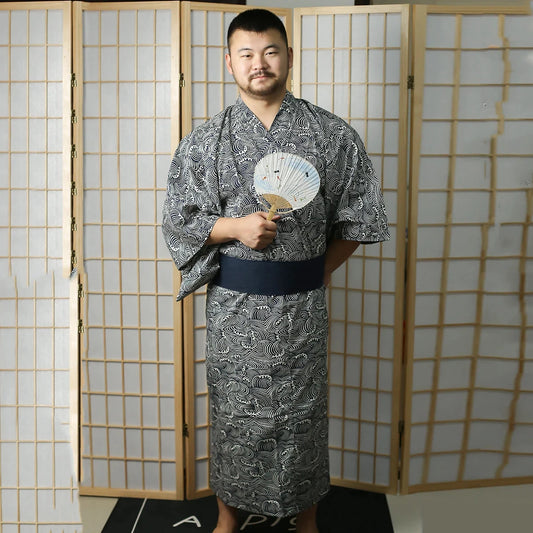
The Obi is arguably the most striking and iconic part of the kimono ensemble. It's not just a belt; it's a statement piece, often intricately woven and beautifully designed, and its tying is a form of art in itself. For beginners, I recommend starting with a simpler obi, like a Hanhaba obi, which is half-width and easier to manage than a formal Fukuro or Nagoya obi. Before you even touch the obi, place an Obi-ita (a stiff board) inside the front of your kimono, tucked under the datejime. This ensures your obi stays smooth and wrinkle-free across the front. There are countless ways to tie an obi, from the simple `bunko` knot resembling a butterfly to the more complex `otaiko` (drum) knot. For your first attempt, a simple bunko knot or a variation is often the most accessible. Start by wrapping the obi around your waist, ensuring it's centred and snug. The obi should sit just above your waistline, covering the datejime. Wrap it around once or twice, depending on its length, and then tie a basic knot at the back. This is where an Obi-makura, a small pillow, comes into play for more structured knots like the otaiko, giving the obi its characteristic shape at the back. Once the main knot is formed, you'll use the remaining ends of the obi to create the decorative elements. For a bunko knot, you'll fan out the ends to form the "wings." After the obi is tied, the Obiage (a decorative silk scarf) is draped over the top edge of the obi, covering the obi-makura if one was used, and tied neatly at the front. Finally, the Obijime, a decorative cord, is tied firmly around the middle of the obi, securing it further and adding a finishing touch of colour and texture. Mastering the obi takes practice, so don't be discouraged if your first few attempts aren't perfect. Remember, this is where many kimono accessories truly shine, adding personality to the traditional look.
"The obi isn't just a belt; it's the soul of the kimono ensemble, a canvas for artistry and a symbol of meticulous dedication."
Yuki Tanaka
Complete Your Traditional Kimono Look
Discover authentic obi, obijime, and all the essential accessories for your Kitsuke journey. Elevate your kimono experience with quality pieces.
Shop Now →⭐⭐⭐⭐⭐ Trusted · Fast delivery to United States
Finishing Touches & Etiquette Tips
You've made it! Your kimono is on, the obi is tied, and you're almost ready to step out. But there are a few more details that complete the traditional look and ensure you carry yourself with the grace of a true kimono wearer. First, your feet. Don your white Tabi socks, which have a split toe for comfort when wearing traditional Japanese footwear. Then, carefully slip into your Zori (more formal sandals) or Geta (wooden clogs, often for yukata or casual wear). These are designed to be worn with a slight overhang at the back of the heel, which is considered proper. Next, consider your hair and makeup. For traditional kimono, a neat, elegant hairstyle (often an updo) is preferred, complementing the high collar of the kimono. Subtle, traditional makeup can enhance the overall aesthetic, though this varies greatly depending on the occasion and personal preference. The overall aim is a polished, harmonious look that doesn't compete with the kimono's beauty but enhances it. This contrasts sharply with the freedom you have when wearing a kimono with jeans or styling maxi kimono dresses. Finally, a word on etiquette and movement. A kimono naturally encourages a certain posture and way of moving. Take smaller steps, keeping your knees together, as large strides can cause the kimono to gape. When sitting, gently pull the kimono fabric over your knees to prevent it from wrinkling or becoming dishevelled. When bowing, keep your hands gracefully clasped in front of you. These subtle movements are an integral part of wearing a kimono and contribute to its elegant impression. It takes practise, but soon you'll find yourself moving with a newfound grace. After wearing, ensure you air your kimono properly and store it carefully to preserve its beauty for years to come.Embrace the Journey, Not Just the Destination
Wearing a traditional kimono is more than just donning a garment; it's an experience, a connection to history, and an act of cultural appreciation. Don't aim for perfection on your first try. Instead, enjoy the process, learn from each step, and savour the transformation. Every time you practise Kitsuke, you're not just dressing; you're participating in a living art form.
Frequently Asked Questions
Yes, initially, wearing a traditional kimono can be quite challenging and intimidating for beginners. It involves many layers, specific tying techniques, and a precise sequence of steps known as Kitsuke. The process requires patience, dexterity, and an understanding of how each accessory contributes to the final silhouette. However, with consistent practice and clear guidance, it is absolutely achievable. Many people find the act of dressing to be a meditative and rewarding experience, deepening their appreciation for Japanese culture. Don't be discouraged by the complexity; view it as a learned skill that improves with every attempt.
A nagajuban is a fundamental inner garment worn beneath the main kimono. It's essentially a thin, kimono-shaped robe, typically made of silk, cotton, or synthetic fabric. Its primary purposes are practical and aesthetic. Practically, it acts as a protective layer, shielding the outer kimono from sweat and oils, thus prolonging its life and reducing the need for frequent cleaning. Aesthetically, its collar is designed to peek out from under the kimono's collar, adding a delicate layer of colour and texture to the ensemble. It also helps in creating the smooth, cylindrical silhouette that is characteristic of traditional kimono dressing, providing a stable base for the outer layers and ties.
The time it takes to put on a kimono properly varies significantly depending on your experience level and the complexity of the kimono and obi style. For a complete beginner attempting Kitsuke for the first time, it can easily take anywhere from 60 to 90 minutes, even with instructional guidance. As you gain practice, this time will significantly decrease. An experienced Kitsuke practitioner might take 20-30 minutes, while a professional Kitsuke master can often dress someone elegantly in as little as 10-15 minutes. The key is consistent practice; the more you do it, the quicker and more fluid the process becomes, allowing you to achieve a beautiful and comfortable fit.
Tags:
Previous
Is it Cultural Appropriation to Wear a Kimono? A Respectful Guide for Non-Japanese
Next
Obi Belts & Accessories: Mastering the Art of Traditional Kimono Styling